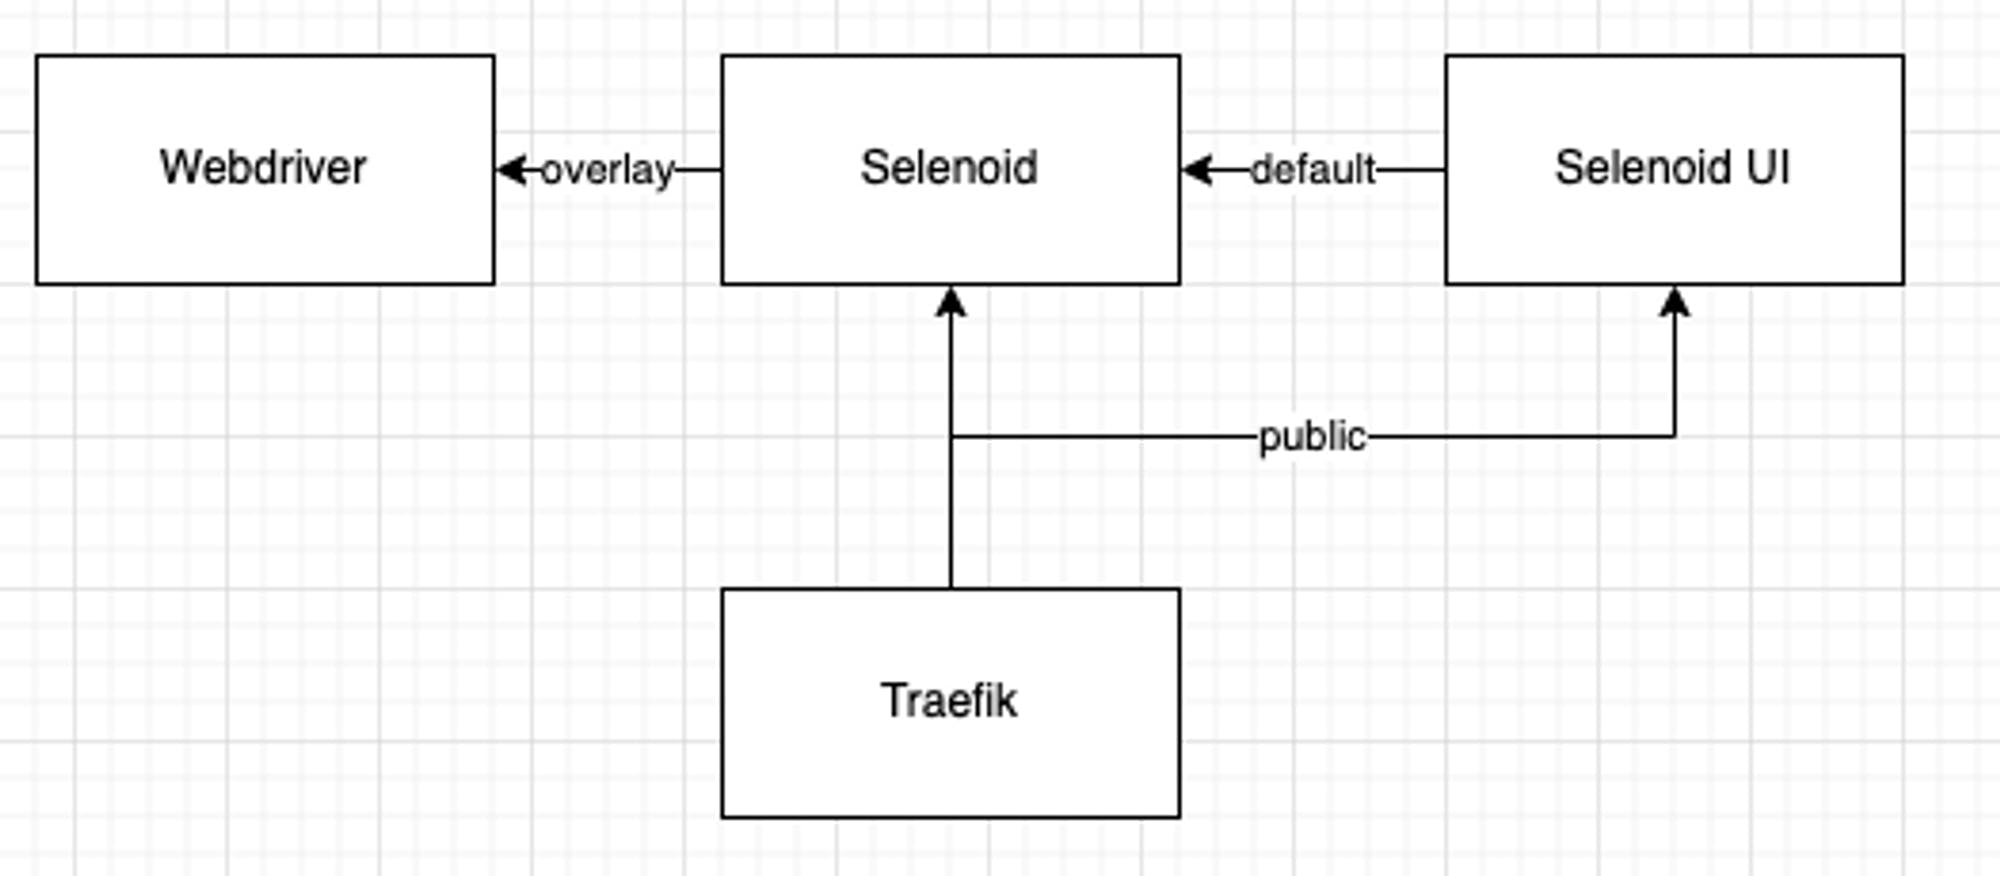
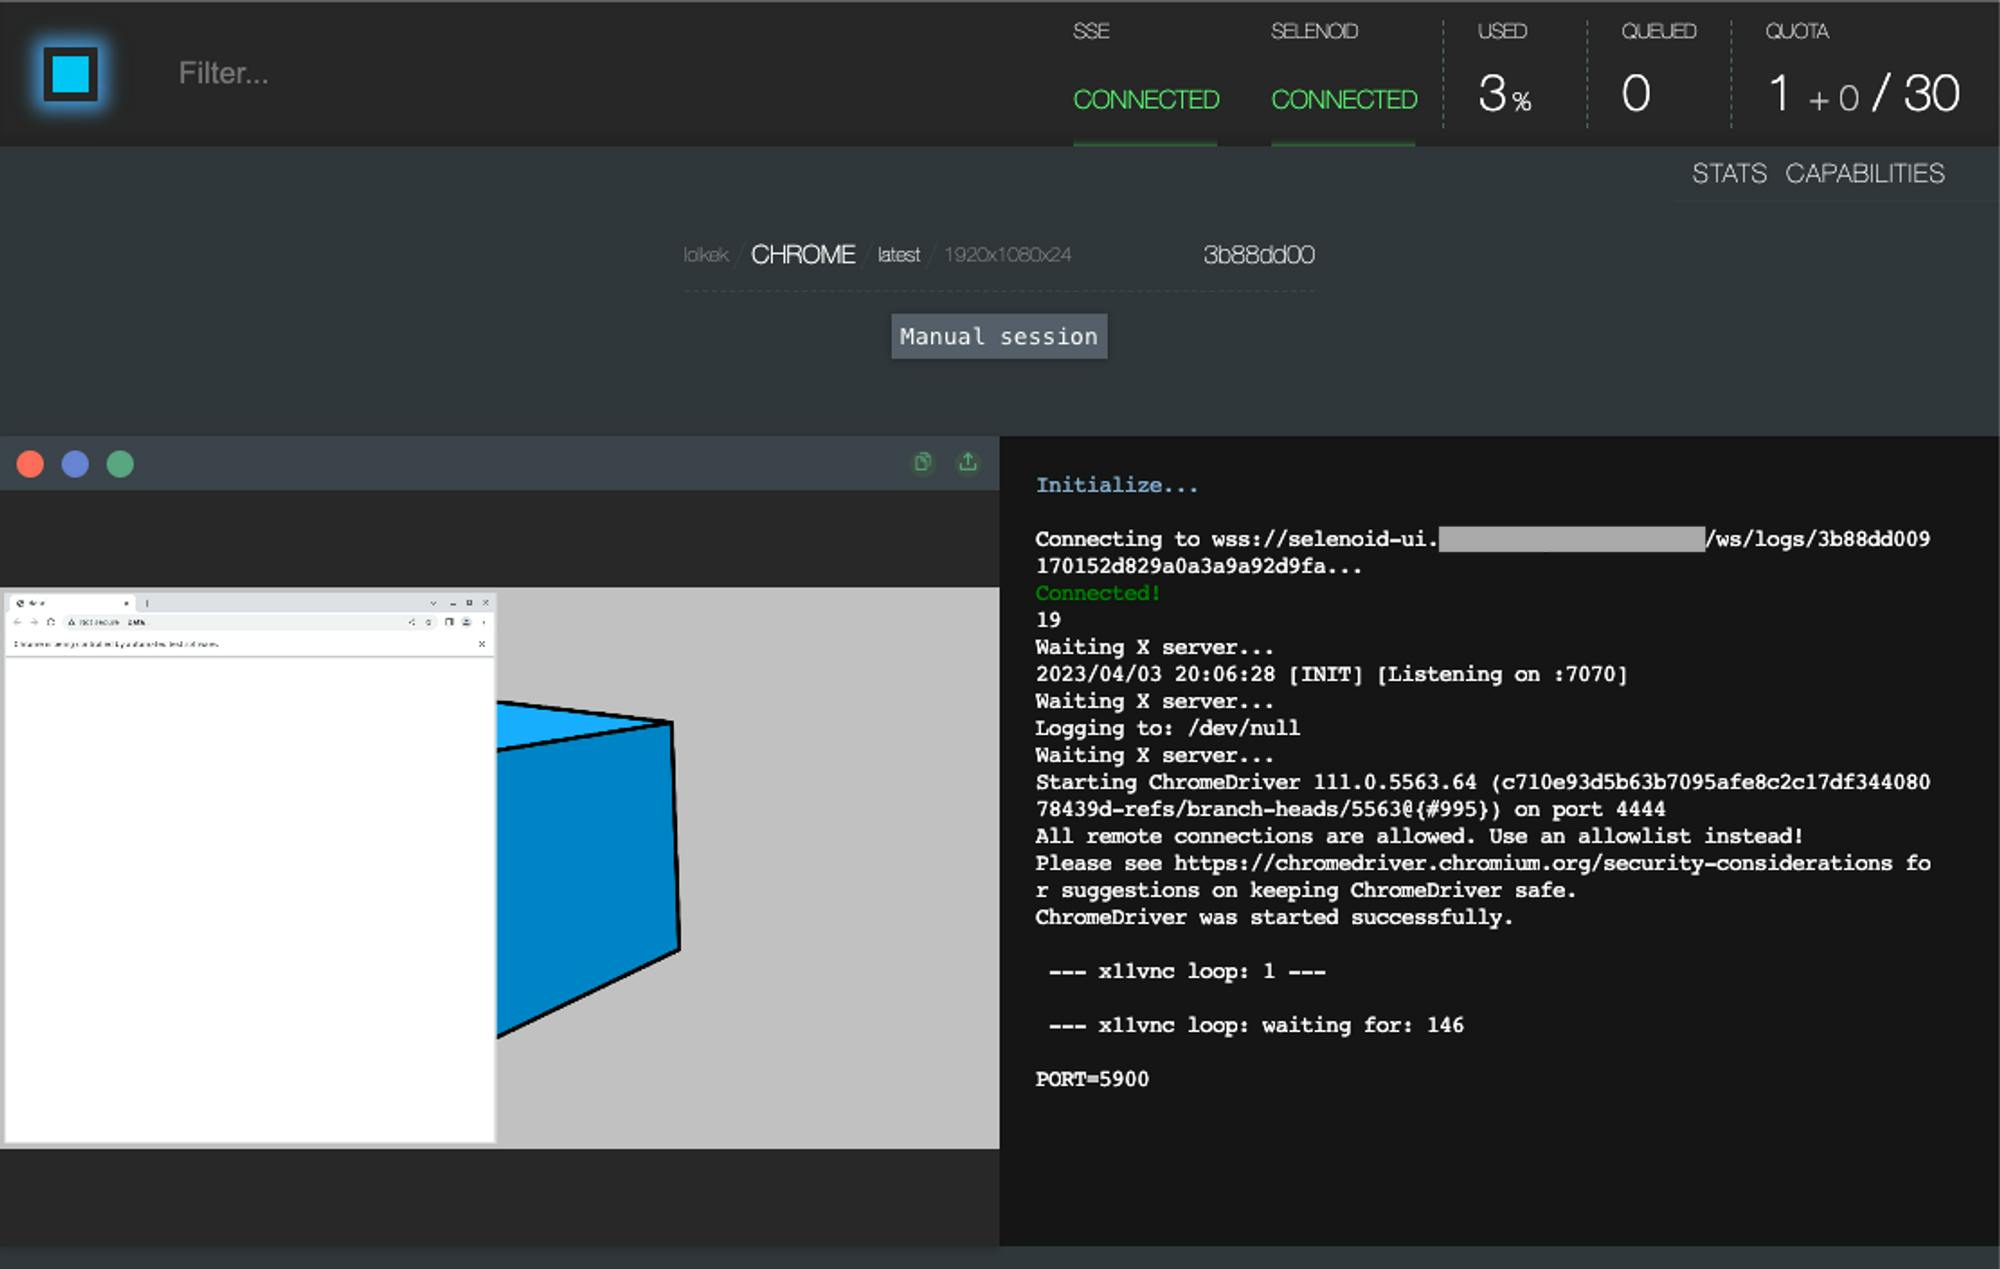
Selenoid UI is a web-based user interface for the Selenoid browser automation tool. It allows users to easily manage and monitor browser containers running within Selenoid, as well as view logs and usage statistics. When used in conjunction with Traefik and Docker Swarm, Selenoid and Selenoid UI can provide a scalable and efficient solution for browser automation testing.
Selenoid is an alternative to the Selenium server. While it uses the same protocol as Selenium, it is designed to be more efficient and scalable for running WebDriver tests. Selenoid works by utilizing Docker containers to run the browser instances, which makes it easier to manage the different browser versions and configurations required for testing.
Compared to Selenium, Selenoid has a smaller memory footprint and can handle a larger number of parallel sessions. This makes it ideal for running WebDriver tests at scale, especially in a distributed environment like Docker Swarm.
Overall, Selenoid provides a more modern and efficient solution for browser automation testing that can help improve the speed and reliability of your testing process.
Selenium: https://www.selenium.dev/
Selenoid: https://aerokube.com/selenoid/latest/
Selenoid UI: https://aerokube.com/selenoid-ui/latest/
Traefik: https://doc.traefik.io/traefik/
Docker Swarm: https://docs.docker.com/engine/swarm/
First of all we need to create configuration file for our Selenoid
The configuration file for Selenoid allows you to specify the different browser versions and configurations you would like to use for automation testing.
For example, you can specify the browser type, version, and platform to be used for testing. You can also define the screen resolution, time zone, and other settings specific to your testing environment.
browsers.json:
{
    "chrome": {
        "default": "latest",
        "versions": {
            "latest": {
                "image": "selenoid/chrome:latest",
                "port": "4444",
                "path": "/"
            }
        }
    }
}
The default port for Selenium is 4444. Therefore, I want to expose Selenoid on port 4444 and Selenoid UI on the default HTTPS port 443. To do this, we first need to expose Traefik ports and create endpoint in Traefik static config.
traefik docker-stack.yaml:
services:
  traefik:
    image: traefik:latest
    ports:
      - target: 80
        published: 80
        mode: host
      - target: 443
        published: 443
        mode: host
      - target: 4444
        published: 4444
        mode: host
    ...
traefik static.yaml:
entryPoints:
  web:
    address: :80
    http:
      redirections:
        entryPoint:
          to: websecure

  websecure:
    address: :443
    http:
      middlewares:
        - secureHeaders@file
      tls:
        certResolver: letsencrypt

  selenoid:
    address: :4444
    http:
      middlewares:
        - secureHeaders@file
      tls:
        certResolver: letsencrypt
By default, Selenoid runs every WebDriver container as standalone and then mounts it to the bridge network. However, when using Swarm, you need to create a new overlay network and use it instead of the bridge network for Selenoid-Webdriver communication.

docker network create -d overlay --attachable selenoid-overlay
docker-stack.yaml:
version: '3'
services:
  selenoid:
    image: "aerokube/selenoid"
    networks:
      - public
      - default
      - selenoid-overlay
    volumes:
      - "$PWD:/etc/selenoid/"
      - "/var/run/docker.sock:/var/run/docker.sock"
    command: ["-conf", "/etc/selenoid/browsers.json", "-container-network", "selenoid-overlay"]
    deploy:
      mode: replicated
      replicas: 1
      labels:
        - "traefik.enable=true"
        - "traefik.docker.network=public"
        - "traefik.http.routers.selenoid.entrypoints=selenoid"
        - "traefik.http.routers.selenoid.tls=true"
        - "traefik.http.routers.selenoid.rule=Host(`selenoid.YOUR_DOMAIN`)"
        - "traefik.http.routers.selenoid.service=selenoid-service"
        - "traefik.http.services.selenoid-service.loadbalancer.server.port=4444"


  selenoid-ui:
    image: "aerokube/selenoid-ui"
    networks:
      - public
      - default
    command: ["--selenoid-uri", "http://selenoid:4444"]
    deploy:
      mode: replicated
      replicas: 1
      labels:
        - "traefik.enable=true"
        - "traefik.docker.network=public"
        - "traefik.http.routers.selenoid-ui.entrypoints=websecure"
        - "traefik.http.routers.selenoid-ui.tls=true"
        - "traefik.http.routers.selenoid-ui.rule=Host(`selenoid-ui.YOUR_DOMAIN`)"
        - "traefik.http.routers.selenoid-ui.service=selenoid-ui-service"
        - "traefik.http.services.selenoid-ui-service.loadbalancer.server.port=8080"
            - "traefik.http.routers.selenpid-ui.middlewares=user-auth@file"

networks:
  public:
    external: true
  selenoid-overlay:
    external: true
Our configuration is now complete and ready for deployment.
docker stack deploy -c docker-stack.yaml selenoid

To get started, simply open https://selenoid-ui.YOUR_DOMAIN in your preferred browser. From there, you can easily create a manual session or copy code snippets for a variety of programming languages.


